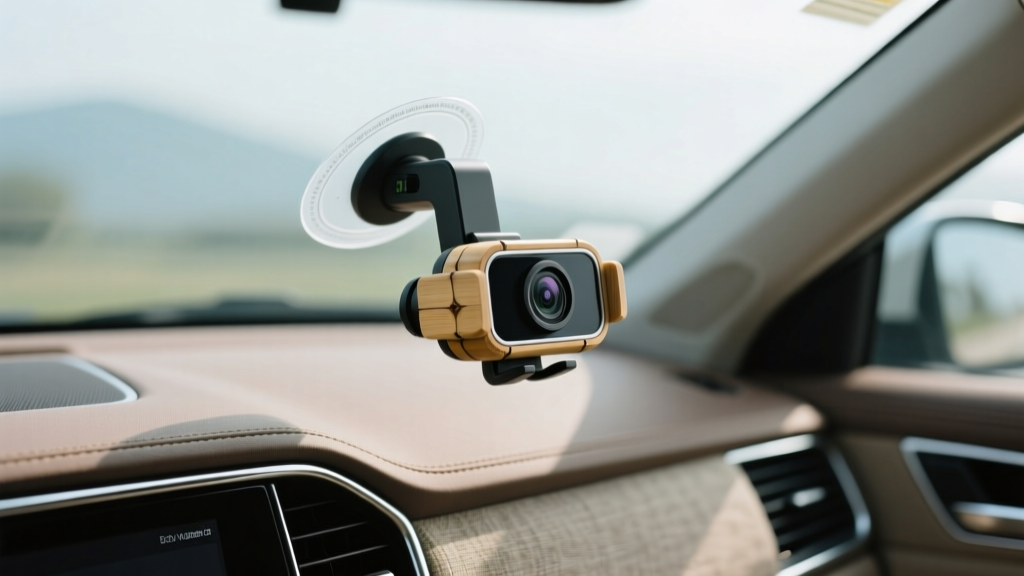
Eco-Friendly Dash Cam Mounts: Alternatives (2026)
Dash cams have become a go-to upgrade for daily drivers, road-trippers, and anyone who wants peace of mind in traffic. The challenge? Most dash cam mounting methods were designed for convenience, not sustainability. Disposable adhesive pads, plastic-heavy suction cups, and constant re-mounting waste add up?especially if you switch vehicles, park in extreme heat, or remove your camera regularly.
This guide focuses on eco-friendlier dash cam mounting alternatives that reduce waste, avoid harsh chemicals, and help you keep a clean, OEM-like interior. You?ll also learn practical installation steps, real-world tips (like what holds up in summer heat), and common mounting mistakes that can damage your windshield, trim, or camera.
If you read Part 1, think of this as the next level: lower-waste materials, smarter placement, and mount choices that are easier to maintain long-term.
What ?Eco-Friendly? Means for Dash Cam Mounting
Eco-friendly doesn?t have to mean ?fragile? or ?complicated.? In the dash cam world, it typically means choosing mounting options that:
- Reduce single-use waste (fewer throwaway adhesive pads and plastic parts)
- Last longer in heat and cold, so you aren?t replacing mounts every season
- Use safer materials (low-VOC cleaners, less aggressive adhesives when possible)
- Preserve interior surfaces to avoid replacing trim pieces or windshields due to damage
- Support reusability when you change cars or reposition the camera
Eco-Friendly Mounting Alternatives (Beyond Basic Adhesive Pads)
1) Mirror Stem / Mirror Base Clamp Mounts (Reusable and Low-Waste)
If your vehicle has an exposed rearview mirror stem or a solid mirror base area, a clamp-style mount can be one of the most sustainable options. No disposable pads. No residue cleanup. Just a mechanical grip.
Why it?s eco-friendlier: These mounts are reusable, often metal-based, and don?t require replacement adhesives.
Best for:
- Drivers who want a clean look with minimal windshield footprint
- Hot climates where suction cups and cheap adhesives fail
- People who frequently move the camera between vehicles
Watch-outs: Not every mirror design supports clamp mounting (especially fully integrated housings with sensors/cameras).
Step-by-step: Installing a mirror clamp mount
- Inspect the mirror assembly to confirm you have a clampable stem or a stable mounting area (avoid fragile plastic shrouds).
- Test-fit the clamp before tightening. Ensure it won?t interfere with mirror adjustment or block any sensors.
- Add a thin rubber or silicone liner (many mounts include one). This improves grip and prevents scratches?plus it reduces the need to overtighten.
- Tighten gradually until the mount doesn?t rotate under light force. Don?t crank it down.
- Route the power cable along the headliner and down the A-pillar (more on eco-friendly cable routing tips below).
- Check camera framing and take a short test drive to verify vibration levels.
Real-world tip: If your dash cam has image stabilization issues, mirror mounts can reduce windshield vibration compared to long suction arms?especially on rough roads.
2) Static-Cling Film + Reusable Mount Plate (Low-Residue, Low-Waste)
Static-cling films are commonly used under suction cups, but they can also work as a reusable barrier layer under certain mount plates. The goal is to avoid direct adhesive-to-glass contact and reduce residue.
Why it?s eco-friendlier: The cling film can be removed and reused, and it helps your mount last longer by preventing contamination from glass treatments and interior off-gassing.
Best for:
- Leased vehicles where you want minimal surface impact
- Drivers who reposition the camera periodically
- Windshields with dot-matrix frit areas where adhesives don?t bond well
Important: Not all dash cam adhesive mounts will hold reliably on cling film. This method works best when the film is used as a protective interface and the mount is designed for smooth surfaces, or when paired with a mount system intended for it.
Step-by-step: Using static-cling film as a mounting interface
- Clean the glass with an alcohol-based glass cleaner or diluted isopropyl alcohol (70%) and a lint-free cloth.
- Apply the cling film and push out bubbles using a plastic card wrapped in microfiber (avoid scratching).
- Let it sit for 10?15 minutes to fully settle and release micro-bubbles.
- Attach your mount according to its instructions and test adhesion with gentle pressure.
- Recheck after 24 hours?heat cycling can reveal weak bonds quickly.
Real-world example: If you park outdoors and your windshield gets hot, static-cling film can reduce the greasy residue that often forms behind traditional adhesive pads, making seasonal repositioning much less messy.
3) Headliner Shelf / Overhead Console Micro-Mounts (No Windshield Adhesives)
Some vehicles have a small ?shelf? area near the headliner or around the overhead console that can support a compact dash cam mount. This approach keeps the windshield clear and may reduce glare.
Why it?s eco-friendlier: You avoid repeated adhesive pad usage and reduce chances of windshield residue that leads to disposable cleaning products.
Best for:
- Small, lightweight dash cams
- Drivers who want maximum windshield cleanliness
- Vehicles with sturdy overhead trim (not flimsy fabric-only headliners)
Watch-outs: Avoid mounting to fragile headliner material alone. If it flexes, your footage may bounce, and you can create permanent creases.
Step-by-step: Safer overhead mounting approach
- Find a firm structure near the overhead console or a trim piece that doesn?t flex.
- Use a lightweight mount with minimal leverage (short arm, compact base).
- Confirm airbag zones (especially curtain airbags) and keep wiring outside deployment paths.
- Test for vibration by tapping the trim lightly and watching the camera view in live preview.
- Secure cable routing using reusable ties or fabric tape designed for automotive wiring.
4) Vent and Dashboard Mounting (Selective Use, Better with Hybrid Options)
Mounting a dash cam on the dashboard or air vent can be eco-friendly if it avoids disposable adhesives. That said, this is highly vehicle- and camera-dependent.
Pros: No windshield adhesives, easier removal, often reusable hardware.
Cons: Can block airflow, increase cabin reflections, and may capture less road (especially in low-profile cars).
Best practice: Consider a hybrid approach?use a reusable vent/dash mount for temporary setups (rental cars, short trips) and a more permanent low-waste mount (mirror clamp) for your primary vehicle.
Eco-Friendly Cable Management (Often Overlooked, Big Impact)
Mounting isn?t just about the bracket. Cable management is where many setups become wasteful?single-use zip ties, cheap clips that break, and adhesives that leave residue.
Better, greener cable routing supplies
- Reusable hook-and-loop cable ties (washable, adjustable, long lifespan)
- Cloth automotive wiring tape (OEM-style, reduces rattles, less brittle than cheap vinyl tape)
- Mechanical tuck routing (tucking into headliner/A-pillar gaps without extra clips when safe)
- Silicone cable sleeves for bundling without adhesives
Practical tip: If you hear new rattles after installing your dash cam, it?s usually the cable lightly tapping trim. A small wrap of cloth wiring tape at contact points can fix it without adding plastic clips.
Product Recommendations and Comparisons (Mount Types, Not Brand Hype)
Because vehicle interiors and dash cam designs vary, choosing a mount type matters more than chasing a specific ?best? product. Here?s a helpful comparison of common eco-friendly dash cam mounting alternatives:
| Mount Type | Eco-Friendly Score | Durability in Heat | Reusability | Best For |
|---|---|---|---|---|
| Mirror clamp mount | High | High | High | Daily drivers, hot climates, clean OEM look |
| Static-cling interface + mount | Medium-High | Medium | Medium-High | Lease-friendly installs, frequent repositioning |
| Overhead/console micro-mount | Medium | High | Medium | Small cams, windshield-free setups |
| Vent/dash mechanical mount | Medium | Medium | High | Temporary installs, travel, rentals |
What to look for when shopping:
- Replaceable parts (swap a clamp pad instead of the entire mount)
- Metal reinforcement in high-stress points (ball joints, clamp arms)
- Shorter arms (less vibration, less stress, longer lifespan)
- Standard ball sizes for compatibility with different camera brackets
Common Mistakes to Avoid (That Waste Money and Materials)
- Mounting over the dotted frit area (the black dot matrix near the windshield edge). Adhesives and suction cups often fail there, leading to repeat installs and more waste.
- Skipping proper cleaning. Even ?eco? mounts fail if the surface has protectants, interior film, or glass coatings. Use a lint-free cloth and a mild alcohol wipe where appropriate.
- Overtightening clamp mounts. Crushing plastic mirror shrouds or trim creates damage that?s far less eco-friendly than a small adhesive pad.
- Routing cables across airbag paths. Aside from safety risks, you?ll end up redoing the install?more clips, more tape, more frustration.
- Using bargain adhesive squares as backups. Cheap foam adhesives often melt in heat and leave residue that requires harsh solvents to remove.
- Ignoring vibration testing. A shaky camera makes footage less useful, and many owners ?fix? it by buying more mounts. Test stability before finalizing cable routing.
Real-World Placement Tips for Cleaner Footage (and Fewer Re-dos)
Eco-friendly mounting also means getting it right the first time. These placement tips can reduce the need to reposition, re-stick, or replace parts:
- Place the camera high and centered behind the rearview mirror when possible. It reduces obstruction and usually improves the field of view.
- Avoid direct sun glare by keeping the lens just below the tinted band (if your windshield has one).
- Check wiper coverage. A camera mounted in an unwiped area will record blurry rain footage, which often leads to unnecessary remounting.
- Confirm ADAS sensor clearance (lane-keep cameras, rain sensors). Don?t block factory sensors?especially in newer vehicles.
FAQ: Eco-Friendly Dash Cam Mounting Alternatives
1) Are suction cup mounts eco-friendly?
They can be, if you buy a high-quality suction mount that lasts years and you don?t toss it after one summer. The eco downside is that many suction cups deform in heat and get replaced often. If you go suction, prioritize durability and consider a static-cling layer to keep the glass cleaner.
2) Will a mirror clamp mount fit my car?
It depends on your mirror design. Exposed stems and simpler mirror bases are usually compatible. Fully integrated mirror housings (with cameras, large sensor modules, or bulky covers) may limit clamp options. Measure first and check that the clamp won?t pinch wiring or interfere with adjustments.
3) What?s the most lease-friendly dash cam mounting method?
A reusable mount method is typically best: mirror clamp mounts or static-cling interface solutions. They reduce the chance of residue and make removal cleaner at lease return time.
4) Can I mount a dash cam on the dashboard instead of the windshield?
Sometimes, yes?especially for compact cameras. You?ll want to verify that the camera angle captures enough road, that heat from the dash won?t overheat the unit, and that reflections aren?t degrading image quality. Mechanical mounts are preferable to disposable adhesives when possible.
5) How do I remove old adhesive residue in a greener way?
Start with the least aggressive method: warm the adhesive gently (park in the sun or use mild heat), peel slowly, then use a small amount of isopropyl alcohol on a microfiber cloth. Avoid heavy solvents unless absolutely necessary, and never scrape with metal tools.
6) Do eco-friendly mounts hold up in extreme summer heat?
Mirror clamp mounts tend to perform best because they don?t rely on adhesive chemistry. Adhesive-based solutions can still work, but durability depends on surface prep, adhesive quality, and whether you?re mounting on a suitable glass area (not the dotted frit).
Next Steps: Choose the Right Low-Waste Setup for Your Vehicle
If you want the most eco-friendly dash cam mounting upgrade with the least ongoing maintenance, start by checking your mirror design for clamp compatibility. If clamp mounting isn?t an option, look at static-cling interface methods or a sturdy overhead-console approach for small cameras. Then finish the job with reusable cable ties and cloth wiring tape to prevent rattles and avoid disposable clips.
Ready to keep refining your interior setup? Explore more practical, car-owner-friendly guides on carinteriormix.com for dash cam placement tips, cable routing ideas, and clean-install interior upgrades.